


The Most Important Kimura Trap Move 💪
Unblock your kimura trap ↔ Backtake ↔ Armbar ↔ Triangles

You already know about my obsession with finding moves, concepts, and strategies that yield the greatest returns regarding advancement and improvement in BJJ.
Starting at the end goal and working backward is the most effective way to learn any movement-based discipline. By giving your body a task and allowing it to find ways to achieve the desired outcome, you enable optimal organization and progress.
Why Kimuras Are Crucial:
As I mentioned in the End-Goal Method issue, Kimuras are an excellent move to start with due to their innate adaptability and versatility. You can use Kimuras from many positions, and they serve as a central node to link your entire game to.
The movement pattern that I believe unlocks this versatility that we are talking about more than any other move is the following:

Why are Kimuras a better control position than any other upper-body submission?
Because they open up many possible routes from a very easy (and safe) grip: The Kimura Trap.

The beauty of the kimura is that depending on how your opponent reacts, you can jump from submission to submission without risking much or losing control.
I rarely ever finish kimuras, but I still use it as one of my main areas because it gives me access to the back much easier than any other move. It also opens up triangle and arm-bar options, and it is a fairly easy grip/position you can get from many places.
Let’s break down some of the details.
I want to keep it as less prescriptive as possible because I believe any transition movement will always have high degrees of variability depending on each person's attributes and limitations. Nevertheless, I do think that some details are almost always visible when we see this transition.
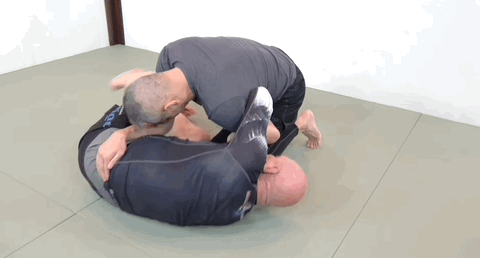
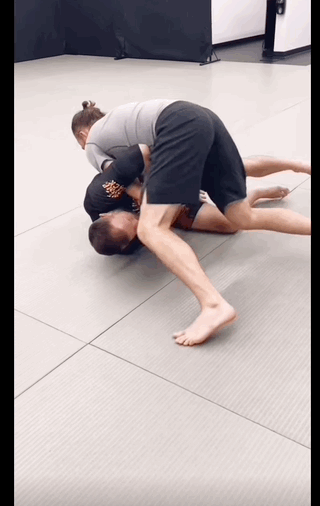
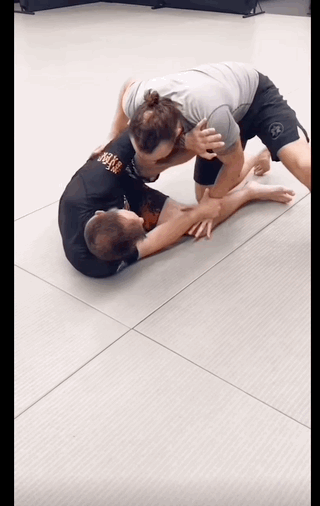
Look at the movement above and notice the following:
He pushes the hand and glues it to his opponent’s belly (instead of pulling)
He uses the Kimura as an anchor and to create the leverage needed to be able to move the rest of his body. This helps him move easily and prevents his opponent from moving to an advantageous position.
He rotates over his upper back and shoulders and not over his head. His head never carries his weight. If done correctly, this is a very safe movement.
He doesn’t loosen his Kimura grip when he gets to the back.
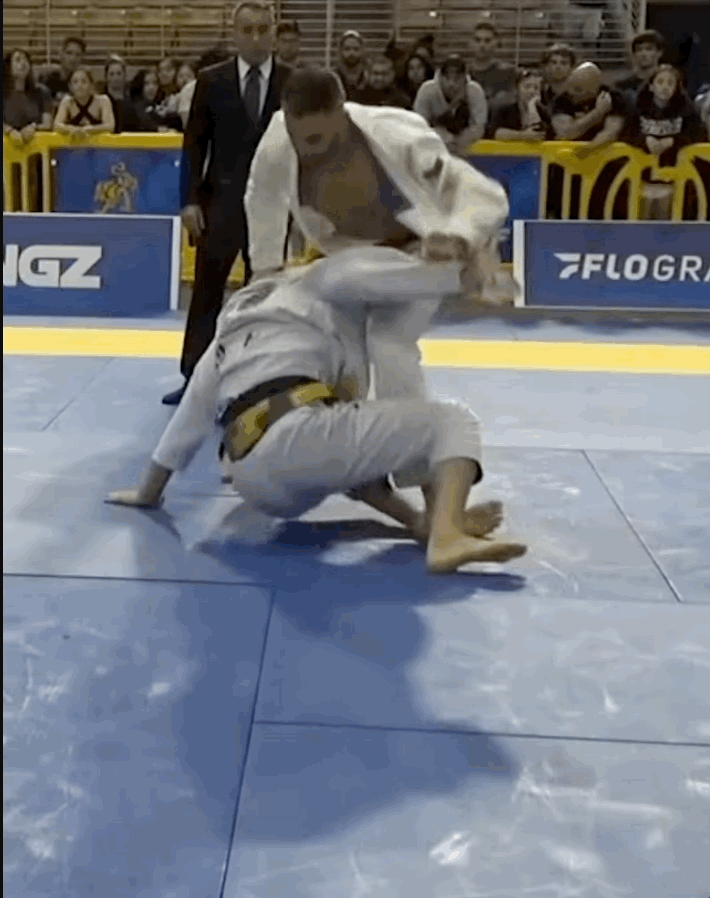
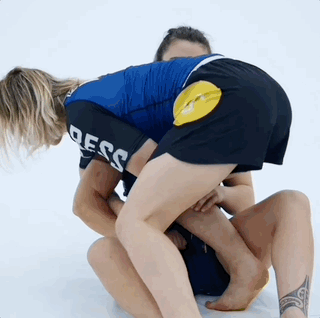
Remember that this movement pattern can be used from almost any position as long as you have a Kimura grip. You can do it from the bottom, top position, and even the mount or side control position.
The trick is to master the movement pattern, and you’ll start seeing the possibility of transitioning to the back (or arm bar) from any Kimura.
That’s it for this week!
🫱 👊 🤼♂️
PS.
Some of you pledged a monthly contribution to this newsletter, and I am very grateful for it.
I know I haven’t produced anything premium for those of you paying a monthly fee, so next week, I will share something with you. I’m not sharing it today because I still need to translate some notes (Not all of them are in English 🤦♂️)
Here’s a sneak peek:

I take a lot of notes when I watch instructionals and fights. Next week I am going to send you (premium members of the newsletter) my notes from my favorite leglock instructional (Leglocks: Enter The System by John Danaher)