


Mastering Kimuras: An 80/20 Deep Dive into General Principles and Flawless Breaking Mechanics
Get Ready to Level Up Your Kimura Game! Explore the Core Principles and Master the Art of Breaking Mechanics in this Issue

My whole goal when learning and teaching BJJ is to find the couple of gems that make the most difference and give me the highest ROI: The 20% that allows me to tap 80% of my training partners.
When it comes to kimuras, I believe there are two things that make the most difference for most people:
First is understanding the three most important general principles of kimuras.
Second is polishing and being able to replicate the invariant factors of how to actually apply a kimura with the most leverage and the fewest possibilities of escape.
The good thing is that these are not very difficult concepts to learn and apply, once you grasp the most important principles from the very beginning.
General Kimura Principles:
Always control their head:
Almost all of my opponent’s ability to escape involves movement of the head.
Control of the head is one of the most important things to keep in mind.
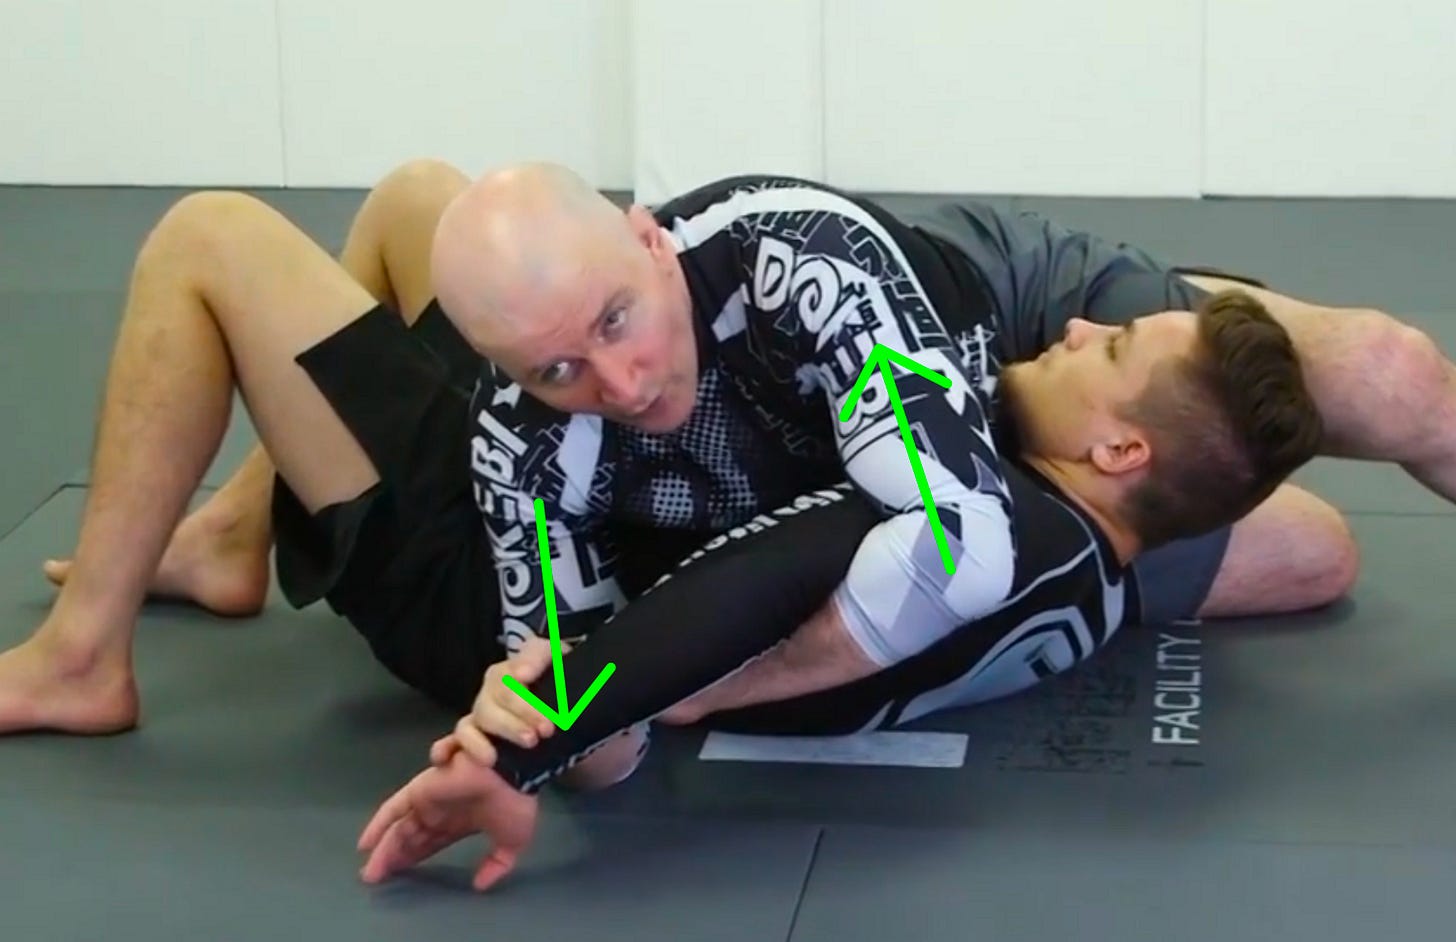
Always align their elbow with the shoulder line:
This is the Shoulderline: The line between his shoulders (and its extension). The more my opponents' elbow is in line with the shoulder line, the more pressure he’ll feel.

Add your legs to the equation to create power and understand that the hands are just there to be able to transmit this power:
The use of our legs is primordial to generate pressure, like Tarikoplatas, for example. Add our legs to our attacks to add more strength.
Kimura isn't our hands against their arm. Our arms are there to transmit the power of our legs and hips to his hands.

Breaking Mechanics
Like most submissions, a kimura involves a lever and a fulcrum.
To apply optimal power and maintain control, you need to grip the end of the lever correctly.
Ideally, position your middle finger where the wrist meets the hand, as shown below:


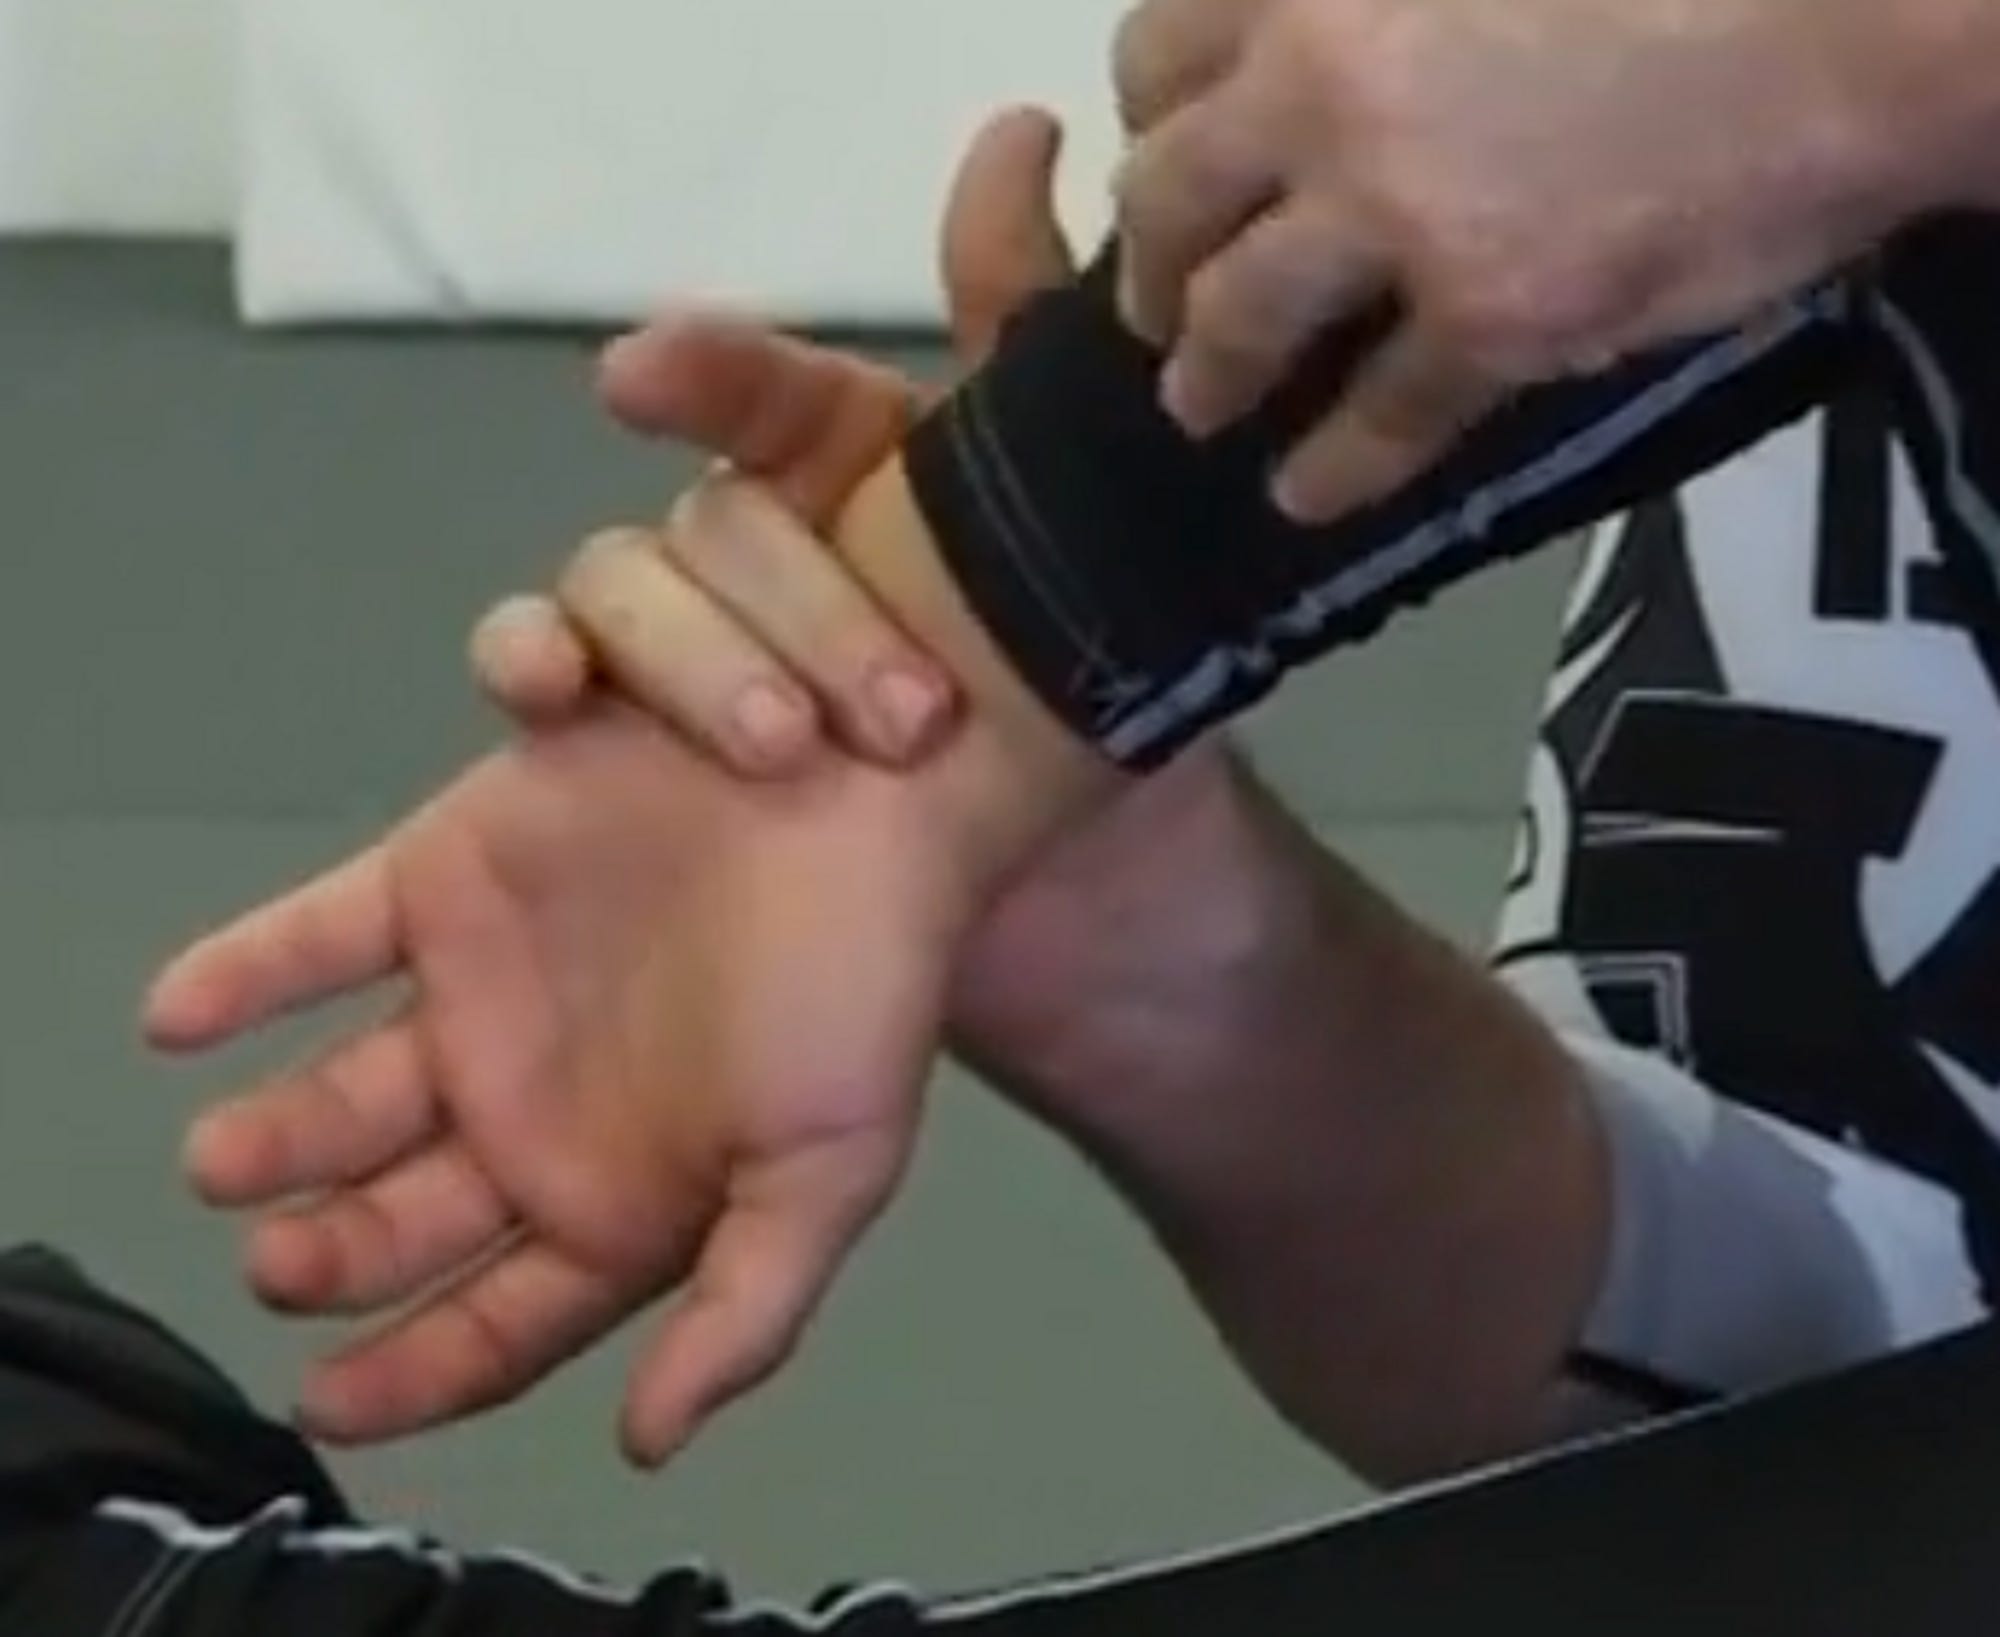
The second hand should also grip the end of the lever (in this case, the end of your primary arm)


• The correct positioning should resemble this

• The second arm needs to be close to the end of the lever as well. Your elbow and his elbow should be as close as possible:

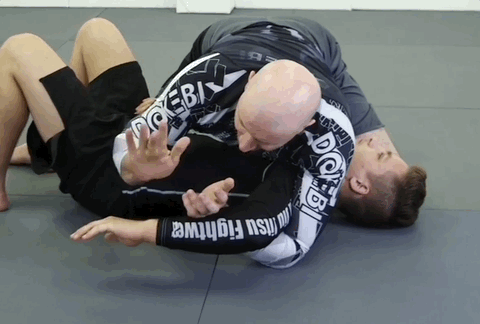
Pull-dominant kimuras are much better than push-dominant kimuras:

Here’s a GIF of the whole setup:
The truth is that these details are not 100% necessary to finish a kimura. I’ve seen very sloppy kimuras break arms, but as a smaller, older, and weaker fighter, I believe these principles make a big difference. These details should serve as a starting point to experiment and find the best way to break an arm and make your kimura control extremely difficult to escape.
Some of you will probably be asking: “Ok… cool details, but how do I get to the kimura in the first place?…” Well, I strongly recommend that you employ the end-goal method we've discussed in the past (read more here) to start figuring out effective ways to get to Kimuras.
I'm currently working with a small group on polishing and improving the 80/20 Kimura guide, and I'll let you know when that’s available for sale. It’s a comprehensive breakdown of the entire kimura system (not just the breaking mechanics) with exercises and a training schedule to make you a kimura pro in very little time (and tapping all your training partners).
That’s it for this week!
Oss 👊
Enrique